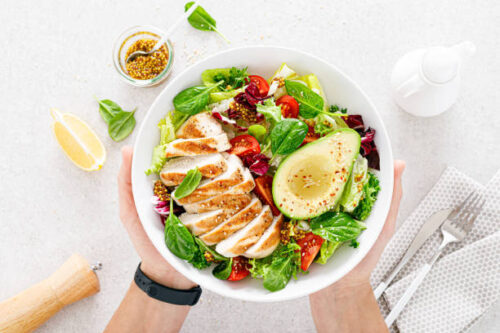
Let’s face facts: Cakes are just as much about the presentation as the flavor. While we all desire a deliciously baked cake with a moist crumb, we also want it to impress our cake-eaters.
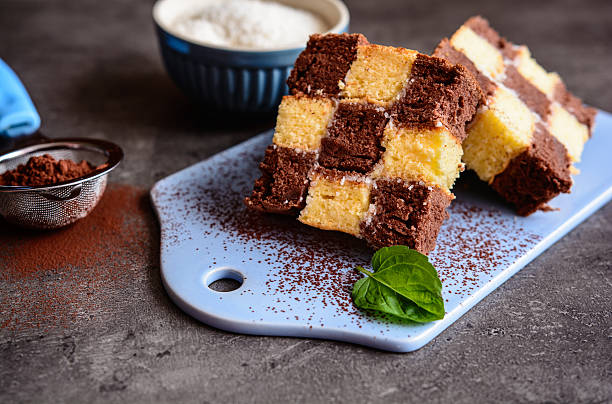
However, some cakes are all about the show, using excessive frosting and sugary decorations to impress their guests. The checkerboard cake is a way to give your cake that WOW factor without sacrificing quality. This is a simple technique that only requires the cake. It creates a dessert that is just as interesting on the inside as the outside. Who doesn’t like a surprise when they bite into a cake. (Answer: nobody.)
Checkerboard cakes are made of two layers of contrasting cake colors that have been cut and reassembled to create a beautiful pattern. You can either use food dye to color the layers or create two completely different types of cakes, like chocolate or vanilla. You’re good as long as the colors are in contrast and the flavors complement each other, it’s great!
This is a demonstration of the technique. I am making a colorful, adventurous, summery version: a pink-hued strawberry and lemon cakes, with lemon curd filling and basil Italian buttercream. The possibilities are limitless once you have the technique down.
Choose your recipe
Any cake recipe you like can be used here, as long as they are well-matched! However, I am making King Arthur’s Tender white cake. This base is great for flavor modification and makes a lovely, soft, fine-crumbed, cake every time.
A checkerboard cake can be made with either two or four layers. You just need the same amount of layers for each color. I prefer tall cakes so I am making four layers of 6 inches from the Tender White Cake recipe. I will split the batter into two parts and flavor each one separately.
How to make a checkerboard-shaped cake?
- Each cake should have one or two layers in round. You only need two of each color.
- Make one batch of your favorite frosting
- Optional: One batch of your favorite cake filling
- Large serrated knife
- You will need 6″ pans and will need a 2″ or 4″ round cookie/biscuit cutter (or both 1 1/2″ and 3 1/2 inches). You will need two, four, and six cutters if you are making 8″ or 9 inch cakes.
- Cake board (also known by the term cake round)
- Pastry bag with large round tip
- Offset spatula
Prepare the colors for your cake layers
First, choose and prepare the flavor and color of your cakes. You can quickly flavor the cakes by having the flavorings ready prior to you begin mixing the batter.
Make a strawberry cake by crushing freeze-dried strawberries in the mortar and pestle. You can also blend the berries in a food processor, or use a rollingpin to place them in a bag. 1/3 cup (7g), strawberry powder was used to color the Tender White Cake recipe.
To make the lemon cake, you will need 2 tablespoons (18g), Lemon Juice powder and 1/8 teaspoon of turmeric. Although the turmeric is not required, it will make your cake whiter. It’s also a good idea to include some color in your checkerboard. Although it won’t appear yellow in the batter it will turn a pale-yellow color after baking. It’s so small that it won’t taste any turmeric.
Divide the batter into three equal parts and color it
This cake can be prepared in one batch. Then, divide the batter and add colors and flavors as needed. You don’t need to make two different flavors of cake (such as vanilla and chocolate), you can just make one batch of batter and then divide it into two.
Tender White Cake makes about 1200g batter. After you’re done mixing, separate into two bowls each with 600g batter. This can be done by eyeballing, but you should make sure that each pan has the same amount of batter.
Mix the flavors together in each half. For my cake, I used 1/3 cup strawberry powder, 2 tablespoons lemon juice powder , 1/8 teaspoon turmeric, and 2 tablespoons lemon juice powder . Divide the batter between four 6″ greased pans. Two pans will have 300g strawberry batter and two pans will have 300g lemon batter.
Bake according to the recipe. My 6″ cakes baked at 350°F for 30 minutes. I would recommend checking every 5 minutes until the cake is well-done, fragrant, and starting to pull away slightly from the edges.
Make your frosting
Let the layers of cake cool completely. It’s difficult to be patient when you are excited. However, this is vital. Otherwise, the frosting and filling will melt and the cake will become unattractive.
Make a batch of frosting while you wait! I made Italian Buttercream by adding basil to the recipe. Basil is a great addition to strawberry and lemon cakes.
This was easy: I just crushed 12 basil leaves in my mortar and pestle to make a paste. Then I added the paste to my buttercream. The visible basil flecks in the frosting are beautiful. However, the green tint was too subtle for me so I added some natural food coloring.
Make your checkerboard cake
Now, let’s get to the fun part! The cake puzzle! Let cool the layers. The dome should be removed so that each layer is level. This allows for easy stacking, and also ensures a uniform interior.
Use round cutters to cut each piece in three concentric circles. An outer 6″ ring, an inner 4″ ring, and a 2″ circle at the center. All the 2″ and 4 pieces should be lightly frost. This is necessary to ensure that the cake sticks together when it’s sliced. If you prefer, filling can be used instead of frosting.
Next, place the pieces back together until each piece looks like a target. Two layers should alternate pink-yellow/pink, and two layers should alternate yellow-pink/yellow.
Make sure you fill the cake
To make a cake with only frosting, pipe a frosting “dam” around the outer layer of the cake. Then, fill the dam with more frosting. A dam that is slightly higher than the rest can be helpful. Cakes need extra frosting to keep layers even.
To prevent the lemon curd from getting into the cake, you should use a thin layer frosting. To add stability, pipe a dam around each layer. Then, make a buttercream swirl inside the dam. This will ensure that the layers don’t move around and the filling looks more checkerboard. Lemon curd can be used to fill in the gaps. You will be a hit with your taste buds.
Frozen and stack
Next, place the next layer on top. Make sure to alternate colors between each layer. Finally, frost the entire thing and then fill it with the same. Once you have placed the last layer, frost the exterior.
A crumb coating will make your cake look neat and clean. After the cake has been frozen for five to ten minutes, you can decorate it to your taste. To keep my cake looking smooth, I kept the decorations to a minimum. This allowed the checkerboard pattern to take center stage. You can do this by using an offset spatula to frost the entire cake, and then using your bench knives to smoothen the surface while you rotate the cake stand.